Sunday, May 6, 2018

BMPT Terminator, Part 1

Here at Glacial Scale Modeling, I pride myself on the ability to interrupt any build in order to research a new topic of interest or to begin yet another build that has caught my fancy. So, in addition to the many current builds in varying stages of completion, I have begun a mini-group build with two other members of IPMS Richmond.

Following our completion of the 1/72 scale Bradley IFV last year, we decided to build Zvezda's 1/72 scale BMPT Terminator.


This vehicle, built on the chassis of the T-72 main battle tank, was designed for supporting tanks and other AFVs in urban areas. It is heavily armored and is armed with four 9M120 Ataka missile launchers, two 30mm 2A42 autocannons, two AG-17D grenade launchers, and one coaxial 7.62mm PKTM machine gun--in total, the definition of "bad-ass."

Kit Parts

Underside of lower hull showing the fine detail

Beginning construction of upper hull

Thursday, March 15, 2018

Lego NASA Apollo Saturn V


Here's a "little" something I worked on while prepping for last month's Old Dominion Open show. The build manual is 198 pages with 337 steps. The finished model stands around 39" tall--impressive, to say the least. It contains separate first, second, and third stages; lunar module descent and ascent modules; service module; command module; and launch escape system. There's a little moon base on which to display the LM along with four(!) astronauts and a water landing base for the command module with flotation collar. Stands are also included to enable the whole thing to be displayed horizontally. All in all, a fun three-day build with no painting needed!

Here are some shots of the build:
Stage 1, completed

Stage 2, under construction

Stage 2, under construction

Stage 3, under construction

Completed Apollo Saturn V
One thing this accomplished was to open my eyes to the scale model kits available of this generation-defining program. I hear that Dragon has a Saturn V model that's almost five feet tall!

Wednesday, January 31, 2018

Gemini Capsule: Decisions, Decisions

Two related questions arose immediately: Which Gemini mission to model and how to display the finished capsule? There were twelve Gemini missions--the last ten were manned. In reviewing the literature, it seems that a lot of emphasis has been placed on Gemini VII, perhaps due to the first-ever space rendezvous (with Gemini VI-A).

I've aways thought about doing Gemini 3, the first manned Gemini flight, mainly because of the corned-beef sandwich incident. John Young smuggled a corned-beef sandwich on-b0ard and, once in orbit, both he and Gus Grissom took several bites before restowing the sandwich before floating crumbs could wreak havoc with the capsule's electronics. Both were reprimanded when they returned to Earth and all future crews were warned not to pull the same stunt. I can see Young and Grissom in their seats with a sandwich floating between them :)

That leads to the display question. I want to be able to show the added improvements and details of the kit. That means that doors would both be open and that one or both of the crew would be absent. I also want to show the detail in both the retrograde and equipment sections. So... my preliminary idea is to show the capsule in an "exploded" display with the three sections moved slightly apart from each other. Maybe a corned-beef sandwich on the center console? I won't make the final decision quite yet. I want to see how construction proceeds.

Starting with the capsule interior, the first thing that needs to be addressed are the seats. As you can see below, the Revell kit seats are rudimentary, at best. Compare that with a drawing of the actual seat:


Thankfully, the seats are addressed by the LVM Interior Detail Kit. The seats on the kit bulkhead will be cut away and the resulting hole covered by Part A. Parts B & C will be fabricated into much better seats.


That's it for this chapter. Now, where did I put that Dremel tool?

Tuesday, January 30, 2018

Revell's 1/24 Scale Gemini Capsule


I've never attempted a project this wide-ranging and I'm viewing it as an opportunity to increase my modeling skills in quite a few areas. I'd seen photos of several finished models of the Gemini capsule on the Space Modeling Facebook page and decided to look into it.

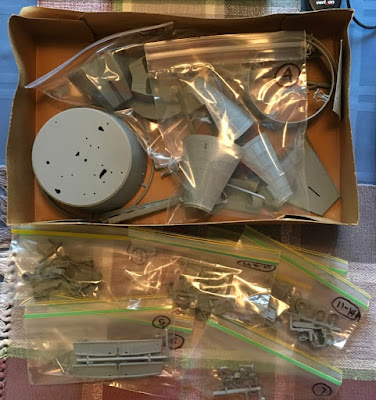
The original 1/24 scale Revell kit was issued in 1966 and has undergone several re-boxings since then. The one I settled on was kit no. 1835 issued in 1993. I found it for a great price on eBay with free shipping and a guarantee that all parts were present. I was doubly glad about the parts guarantee when I first opened the box:


I immediately went through the instructions and bagged the individual parts step-by-step and found that they were all present and accounted for:


The Revell Gemini capsule was modeled after McDonnell Aircraft Company's mock-up and does not resemble the capsule as flown into space. Reading the posts and comments on Space Modeling led me to order several aftermarket sets. I'll cover each of these and the need for them as I get to them in the build but here they are:


Gemini Interior Detail Kit, LVM Studios, www.lvm-studios.com

Gemini Detail Set (Exterior), RealSpace Models, www.realspacemodels.com

Ultimate Decals, Gemini, Space Model Systems, http://www.culttvmanshop.com/Space-Model-Systems_bymfg_70-0-1.html

More to follow on my preliminary research, my initial approach to the kit, and the start!

Thursday, July 4, 2013

StuG III (Fl): Paint At Last!

Finally got the opportunity to do some initial painting on my Fl. This was my first experience with trying the modulation technique. Let's just say I learned some valuable lessons for "next time"!

Next up are decaling (not many on this beast), tow cables, antennae, and then painting the wheels, tracks, and on-board equipment. Then the final weathering and basing which will finish up this project.

Here's a shot of the Fl as it sits right now. For more pictures please see my build log on Tanks and Things, http://tanksandthings.niceboard.org/t5314p30-stug-iii-f1-mark-groth


Friday, May 31, 2013

KV-2 Finished (For Now)


Well, I made it under the wire for the May Braille Scale build on Tanks and Things. Still some little things to correct/do to totally finish it up, but for now, this is it. I need to clean up some paint wear on the turret roof, fix the grime on the front of the hull, add some graphite to parts of the tracks and MGs, and finish the headlight lens. Oh, and maybe add it to a scenic base.

For more photos you can check out my build log here: http://tanksandthings.niceboard.org/t5559p15-trumpeter-kv-2

Now back to the paint booth for my StuGs!

Thursday, May 23, 2013

Finnish StuG III Ausf.G

Arrrrgh, just realized that I haven't posted ANY updates on my Finnish StuG III and it's ready for painting. To see in-progress photos please jump to my postings on the Tanks and Things forum, http://tanksandthings.niceboard.org/t5315-stug-iii-ausfg-finnish-army-mark-groth

Here's a shot of where it stands right now:
 
The logs are not yet attached, they're simply leaning against the hull for illustrative purposes.